
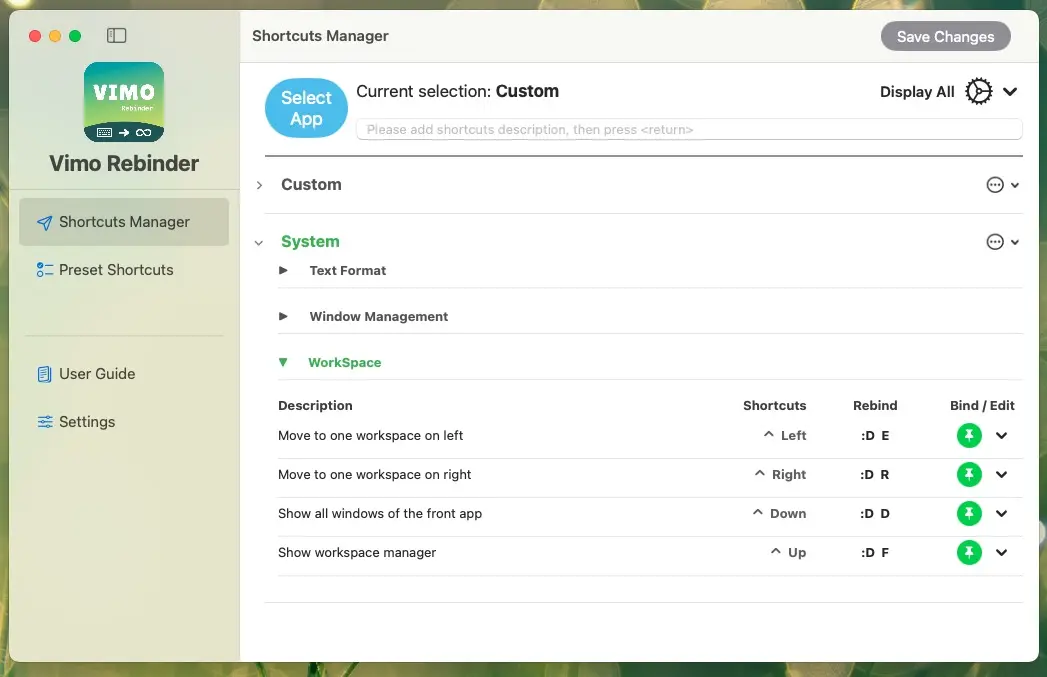
Overview
Shortcuts Manager is the interface for managing shortcuts. Here, we can perform shortcut addition operations.
Adding Shortcuts
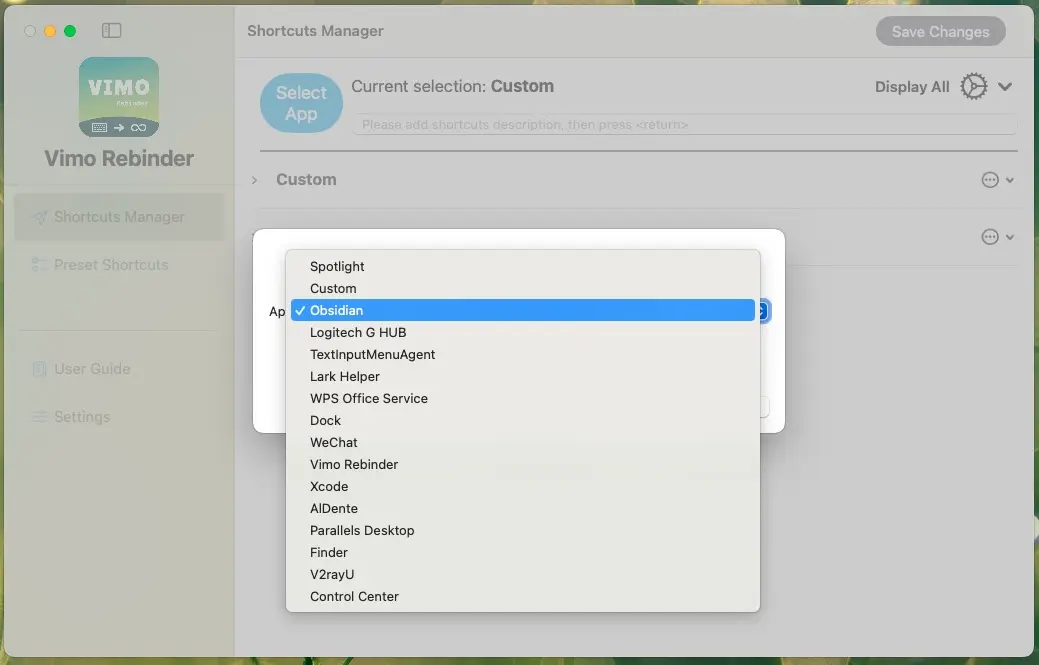
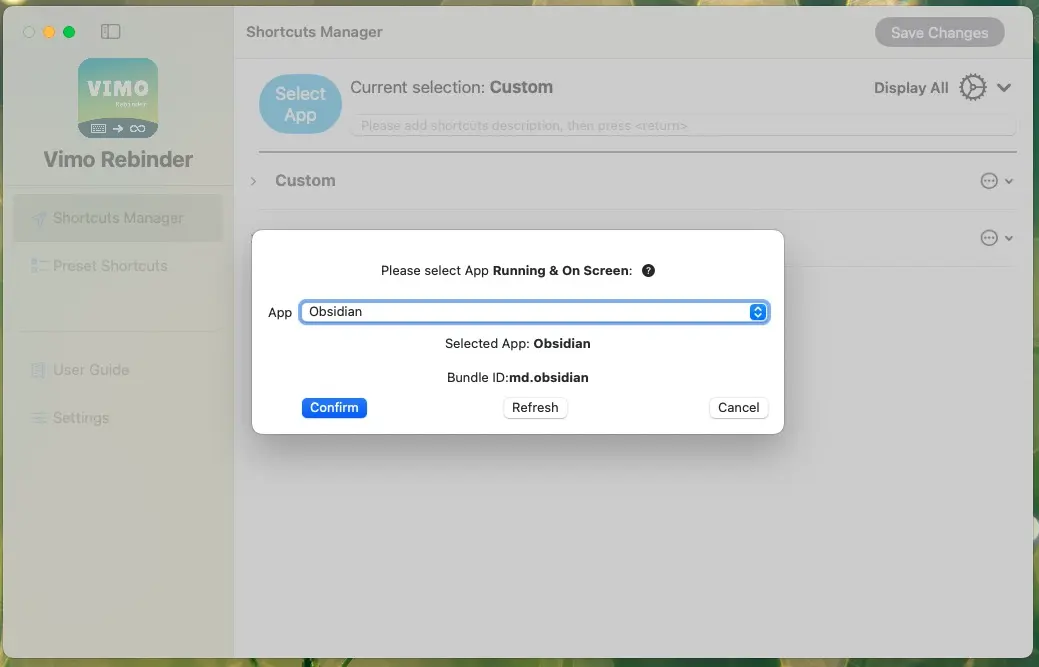
Selecting an App
Vimo Rebinder can detect currently running programs that appear in the current Desktop. Users only need to open the APP they want to add shortcuts for and keep it on the desktop (this is done to filter out unnecessary background processes and reduce unnecessary options). Return to Vimo Rebinder, select Custom Rebinds -> App Select to choose the APP for which you want to add shortcuts.
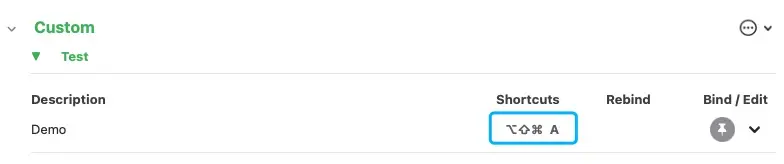
Adding a Shortcut
After selecting the App, enter the shortcut name in the Textfield and press Return/Enter to confirm. The Shortcuts Setter will pop up. Simply press the corresponding shortcut keys and then press Return/Enter to add.
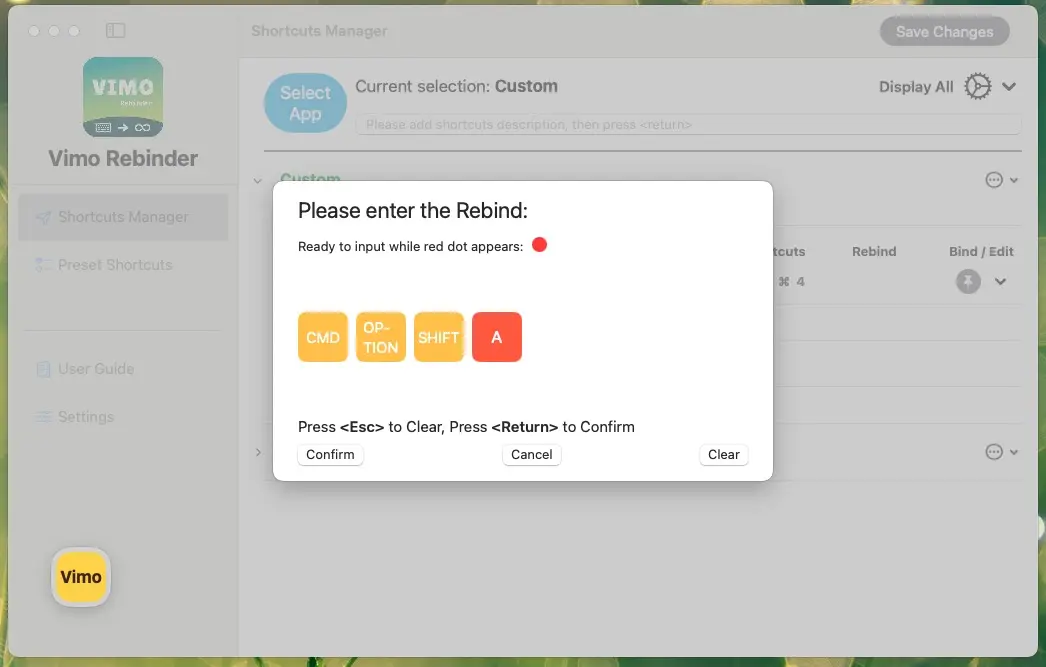
Note: When adding shortcuts in the Shortcuts Setter, you don't need to press all keys simultaneously. Pressing them sequentially is sufficient. This design allows users to operate and add shortcuts with one hand.
Rebind Settings
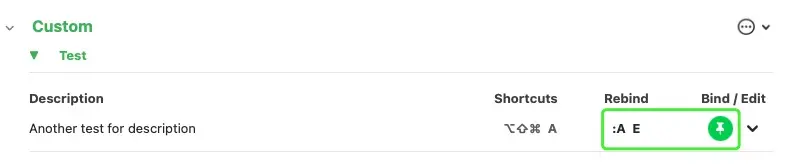
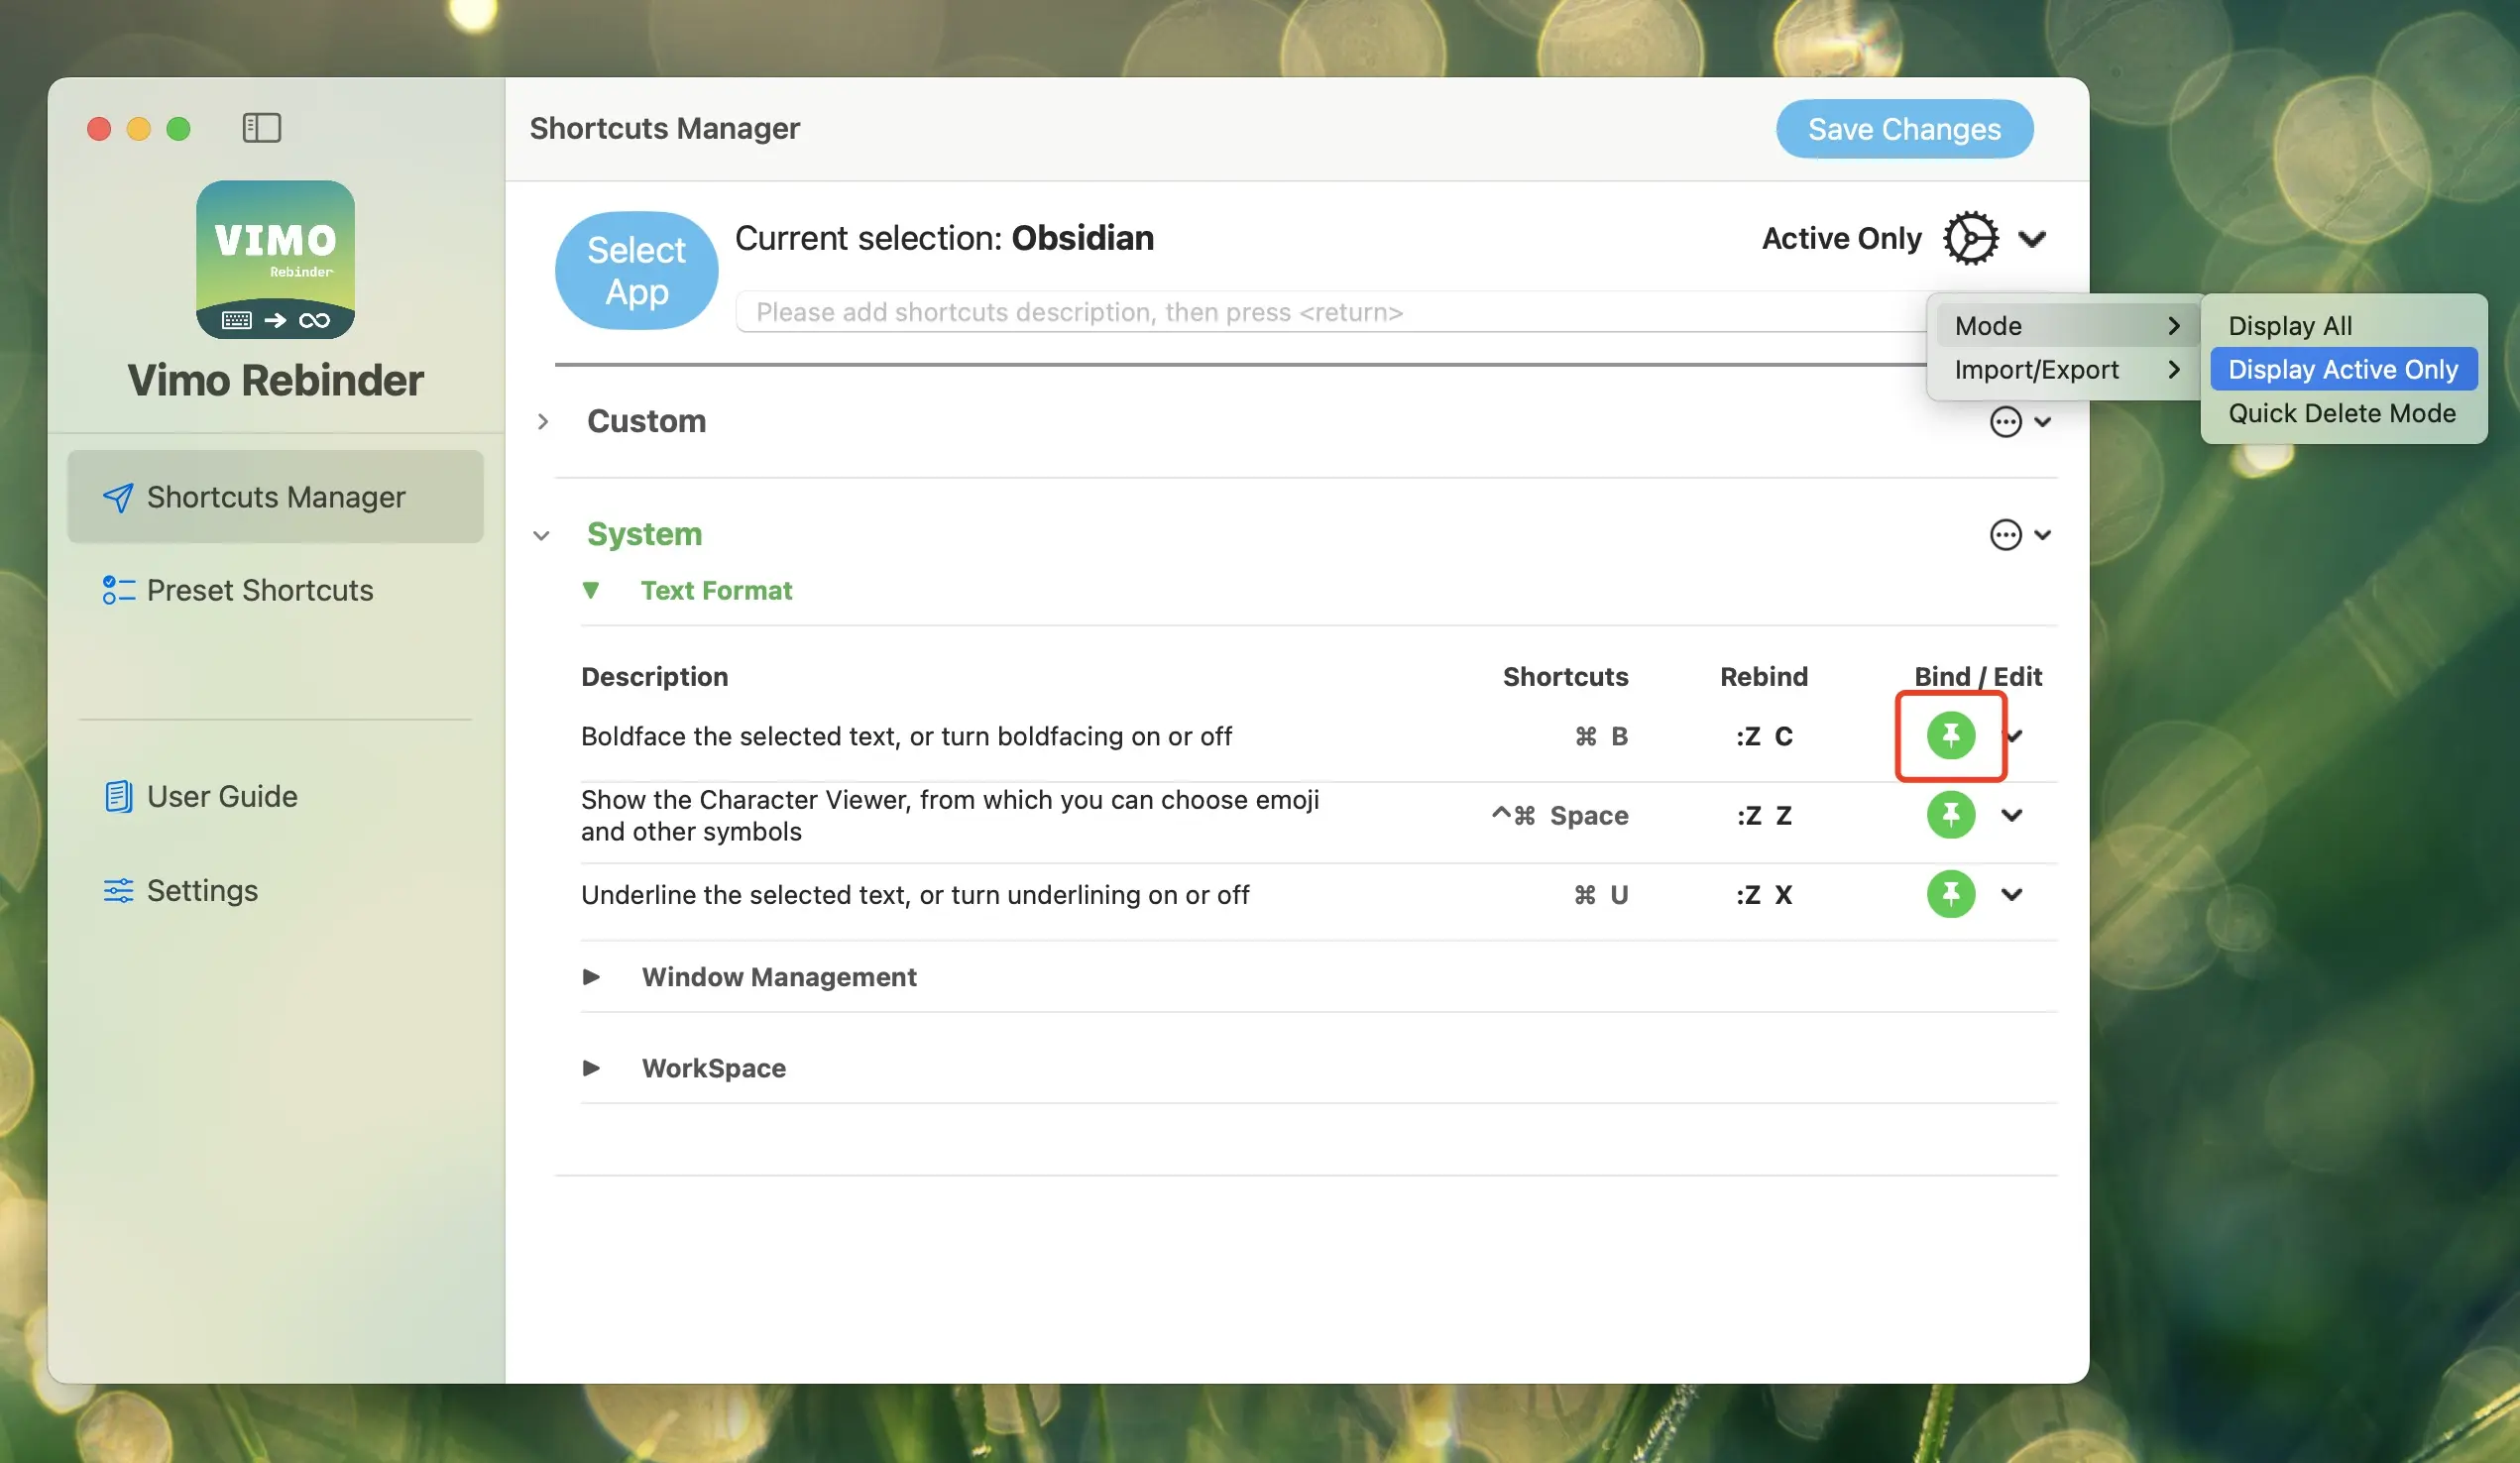
Clicking on the icon corresponding to the shortcut will bring up the rebind settings interface.
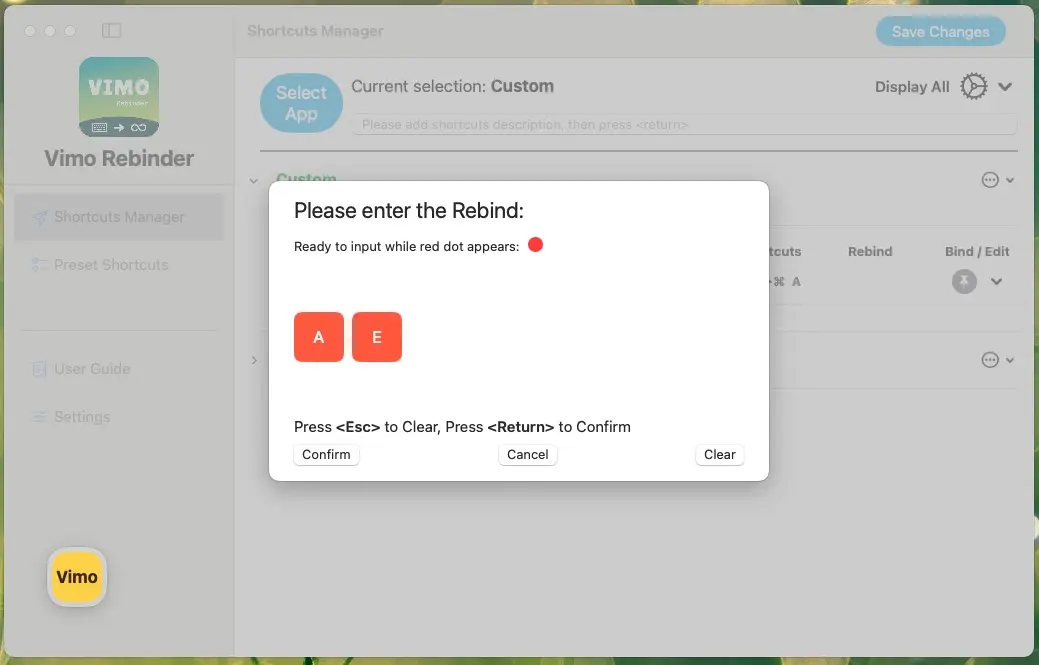
When the rebind shortcuts is set, the indicator will turn green, indicating that it is now in an activated state. The rebind shortcut will also be displayed on the interface.
Since there is only one super key, it will not be shown in the rebind shortcuts.
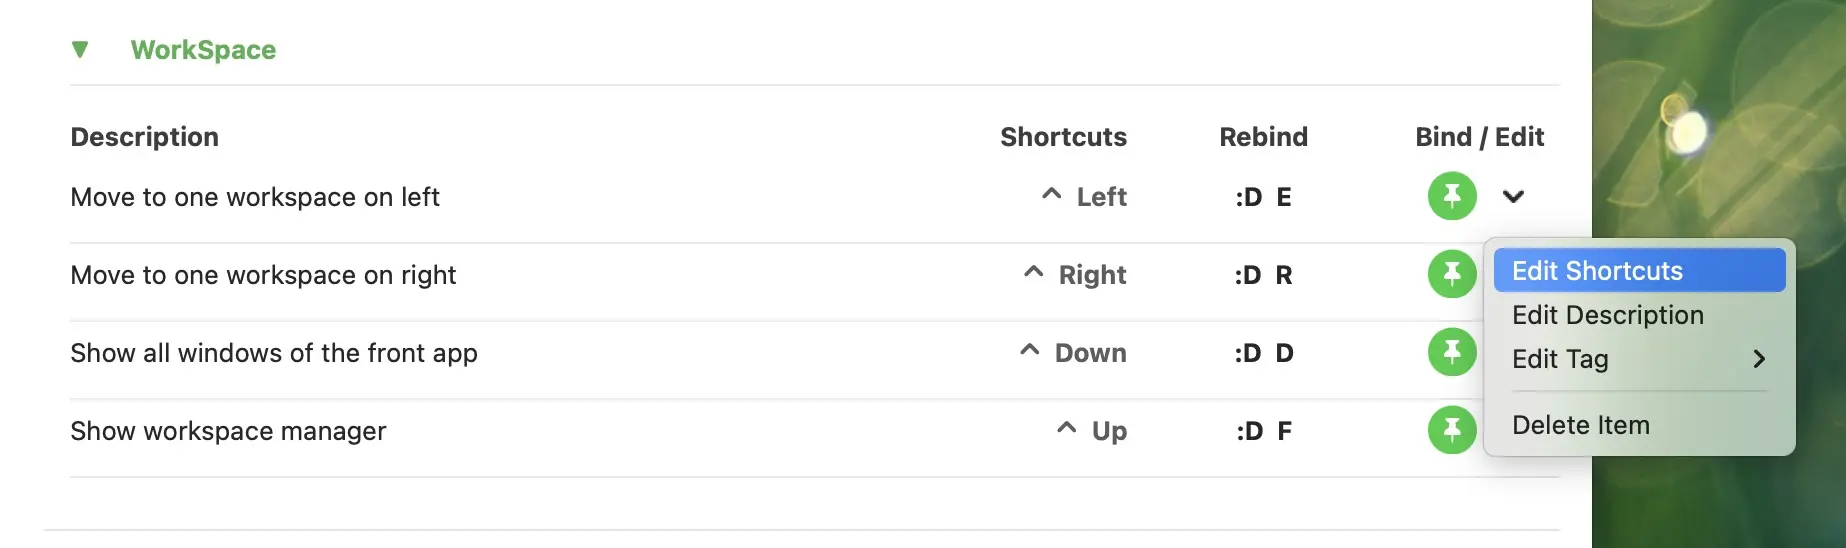
Modifying Shortcuts
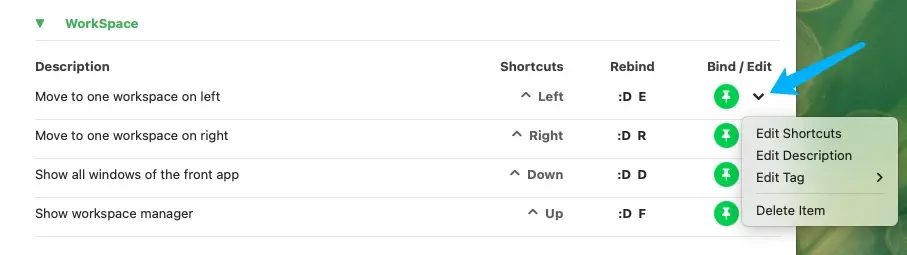
Click the "⌄" icon on the right side of the entry:
Modifying a Shortcut
Click "Edit Shortcut" to change the original shortcut for that entry.
Modifying Description
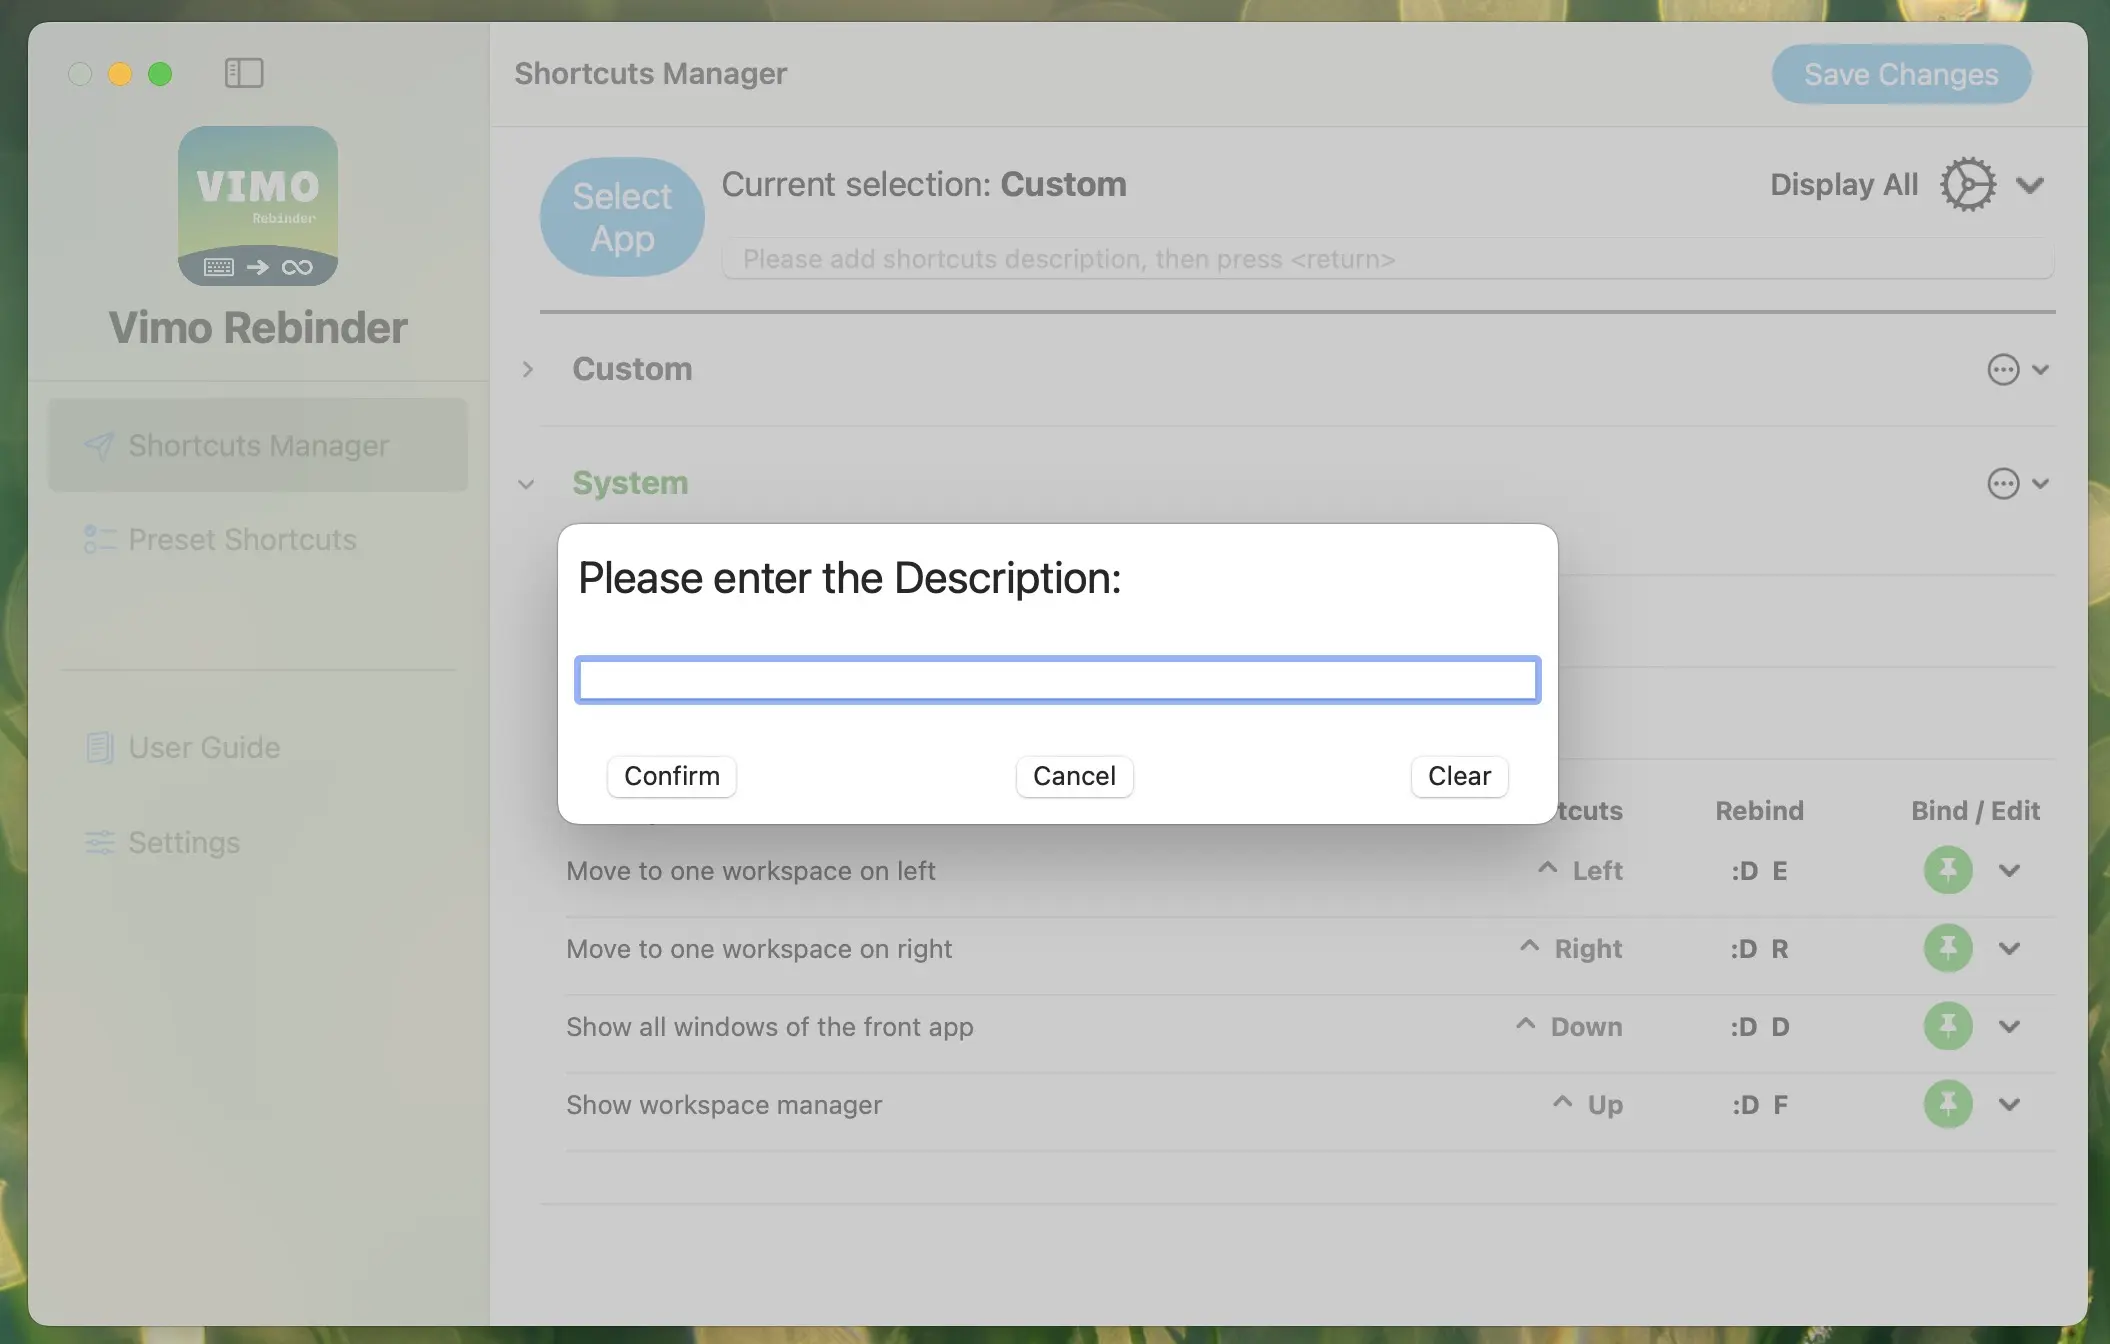
Click "Edit Description", enter the content in the pop-up modification interface to make changes.
Modifying Subcategory
Click "Edit Tag", a submenu will pop up
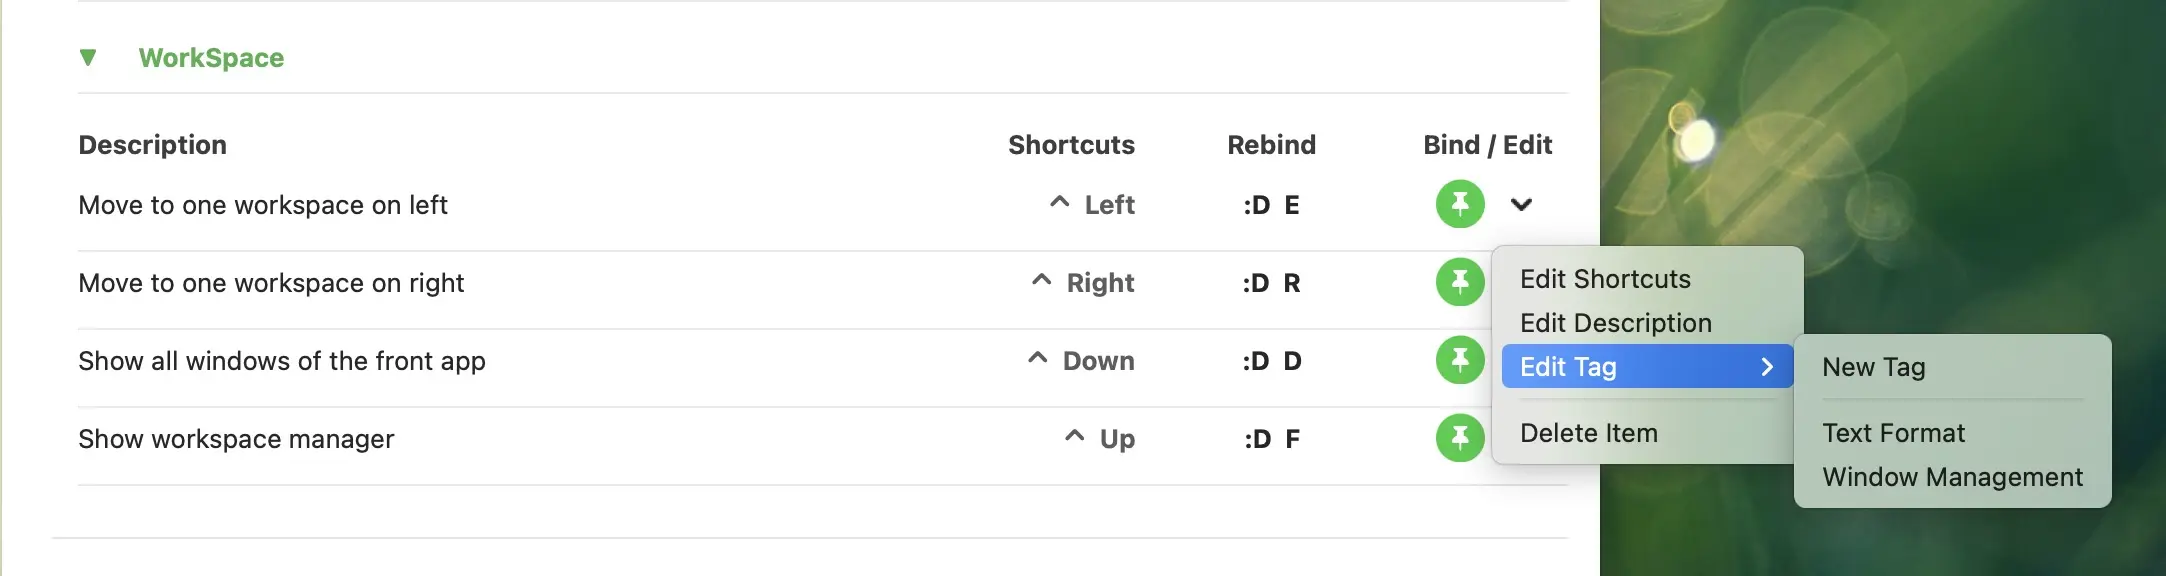
- Add a new Tag(Subcategory)
Click "New Tag", a modification window will pop up. Edit and confirm. - Directly adjust by clicking on other displayed categories
The category submenu can also show categories other than the current one. Click on the corresponding item to move the current entry to that category.
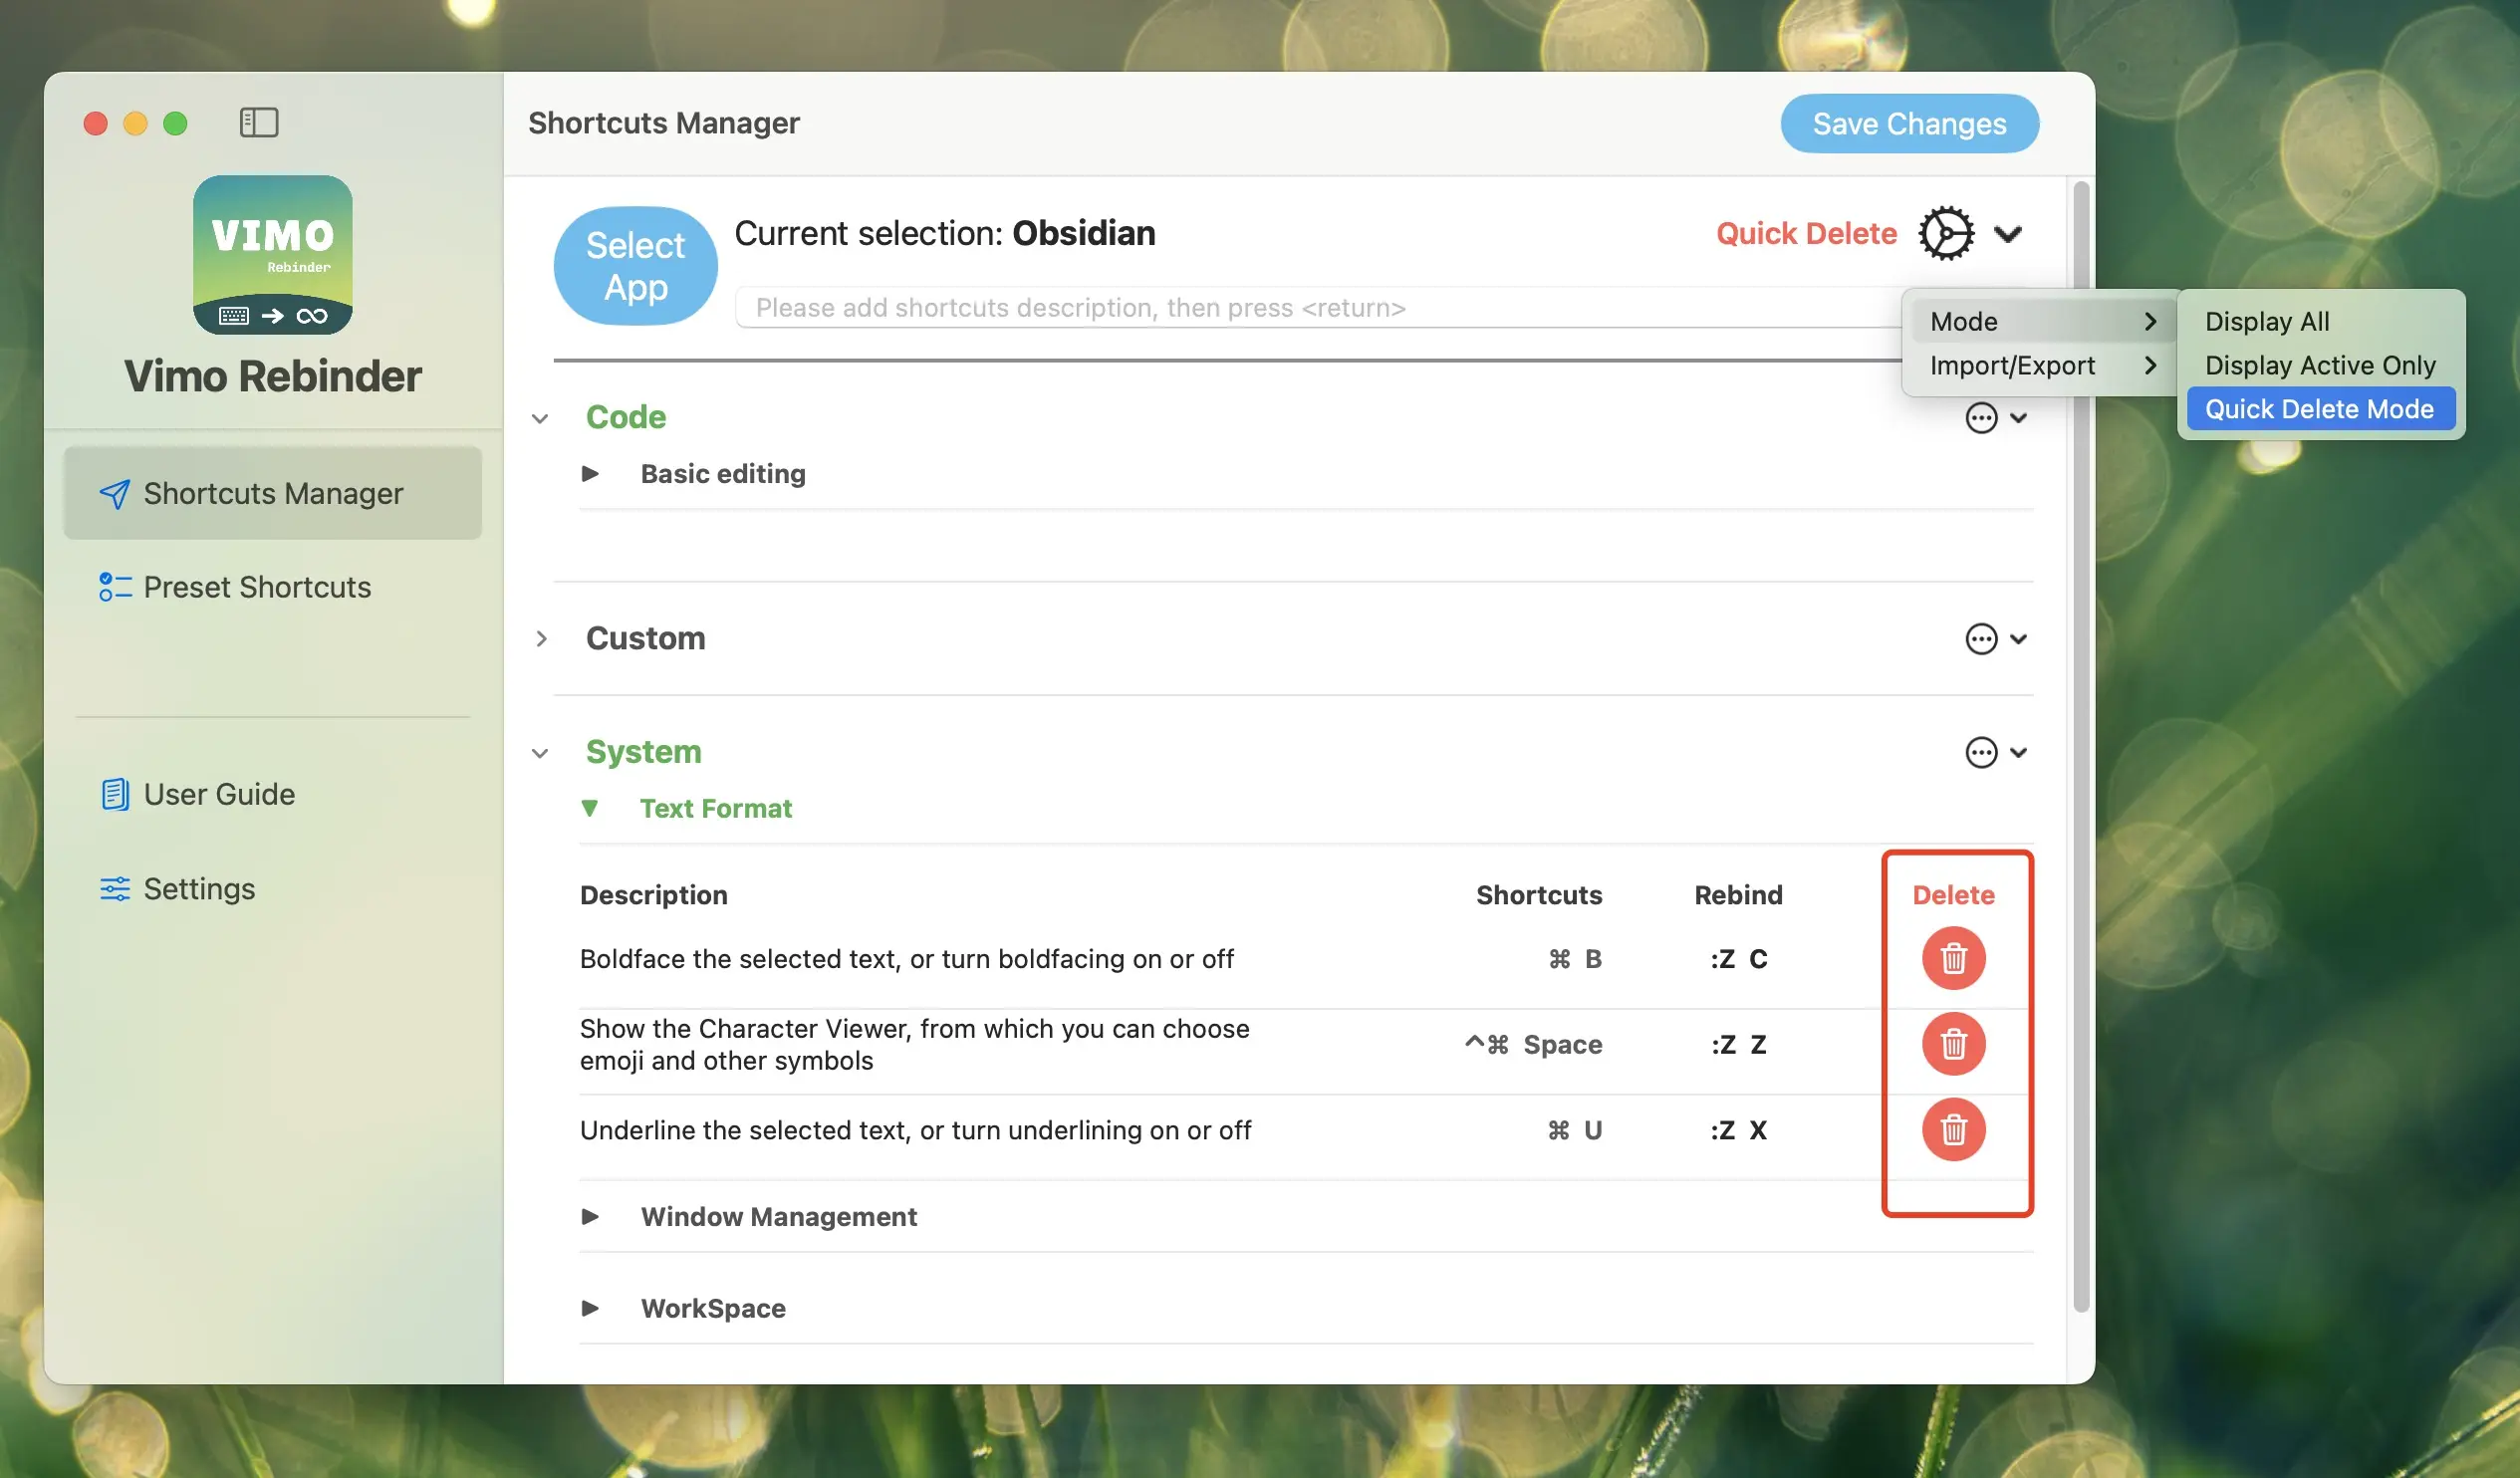
Deleting a Shortcut
Click "Delete Item" as shown in the image.

Category Menu
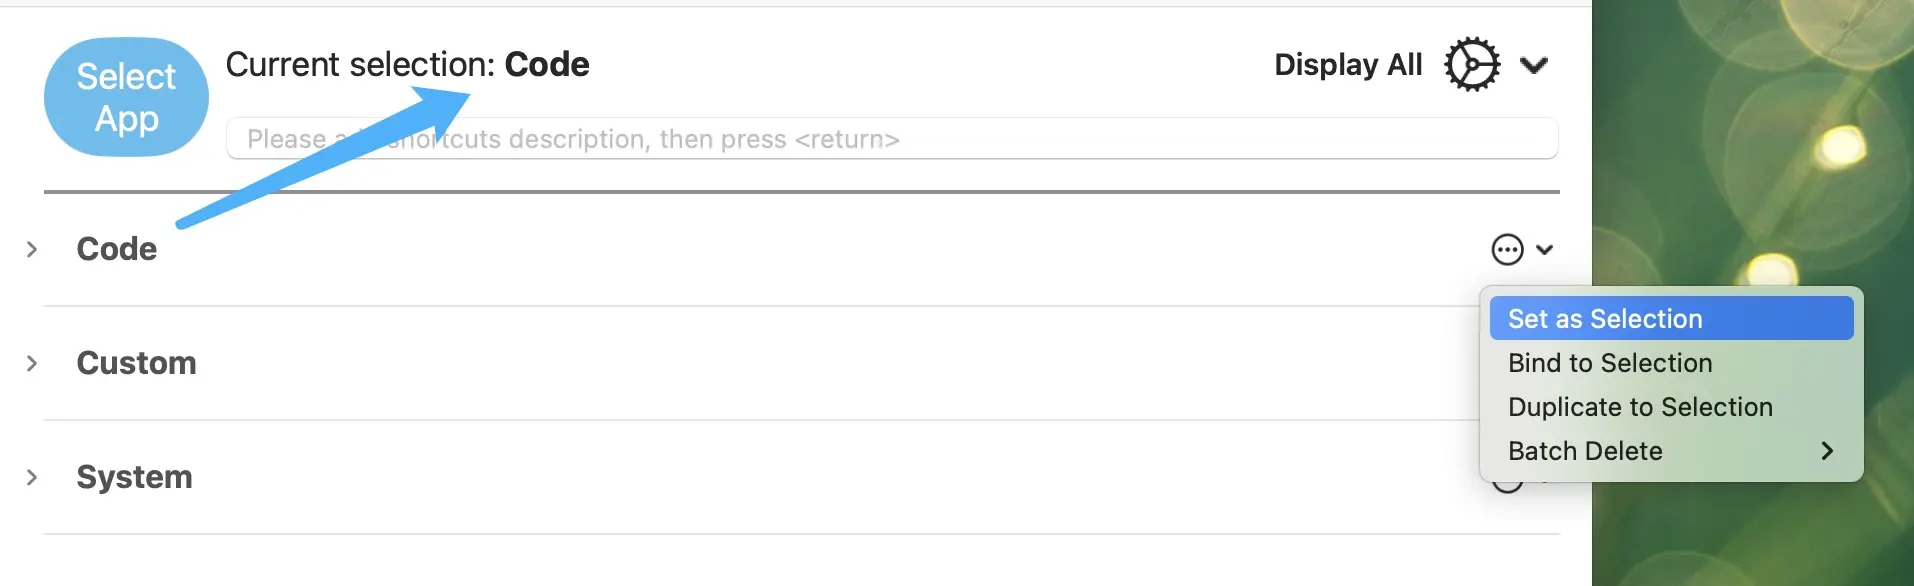
Quick Selection
For APPs that have already added shortcuts, when you need to add again, you don't need to reopen the APP and use the App selector. Simply click the "☰" of that Category and click select. The APP will then be set as the current selection.
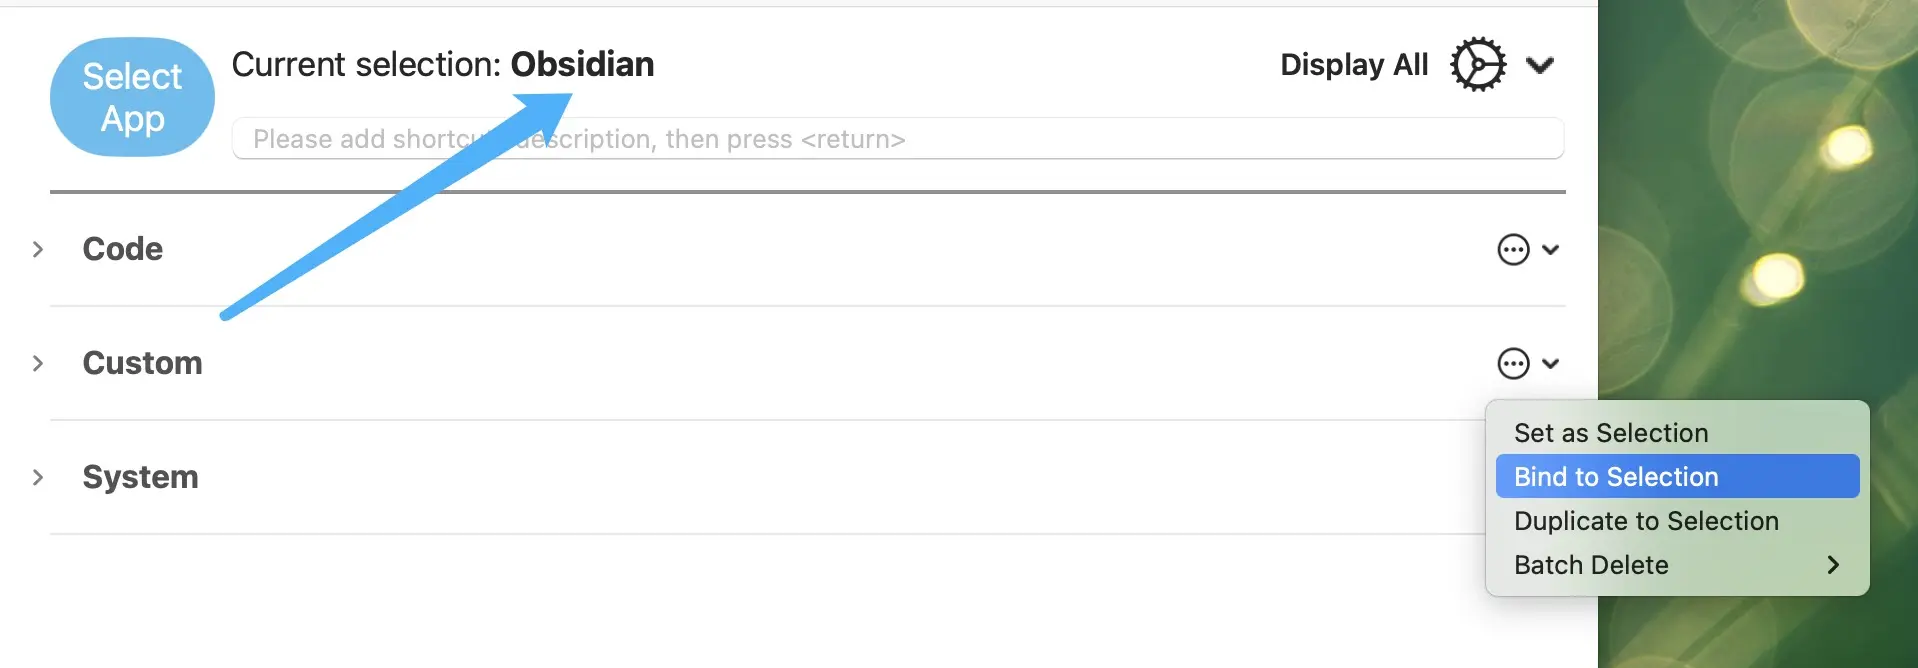
Category Rebinding/Migration
Applicable scenarios:
-
When the target App is upgraded, and its Bundle ID / App category name changes
-
To rebind all Rebind shortcuts of a currently set APP to another APP
First, we select the target App to migrate (using the App selector or through the App category menu for quick selection)
Then, open the category menu and select "Bind to New App". All shortcuts will be moved to the new App.
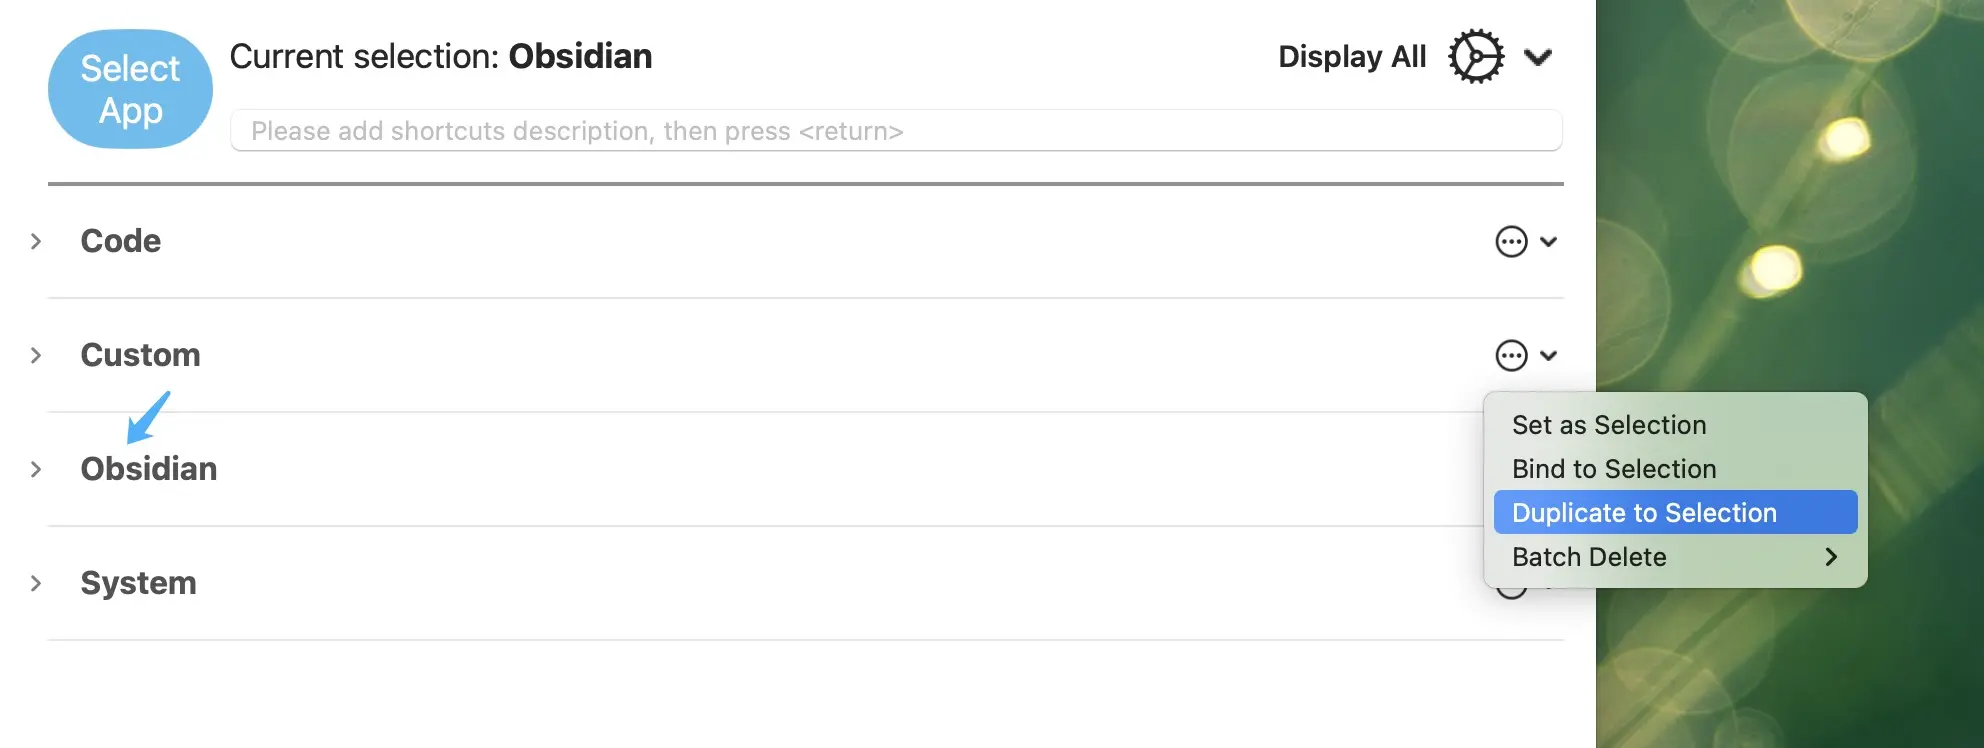
App Multi-version Copy
If you want to add another APP and use the same set of shortcuts:
First, select the target App to backup (using the App selector or through the App category menu for quick selection)
Then, open the category menu and select "Backup to New App". All shortcuts will be copied and added to the new App.
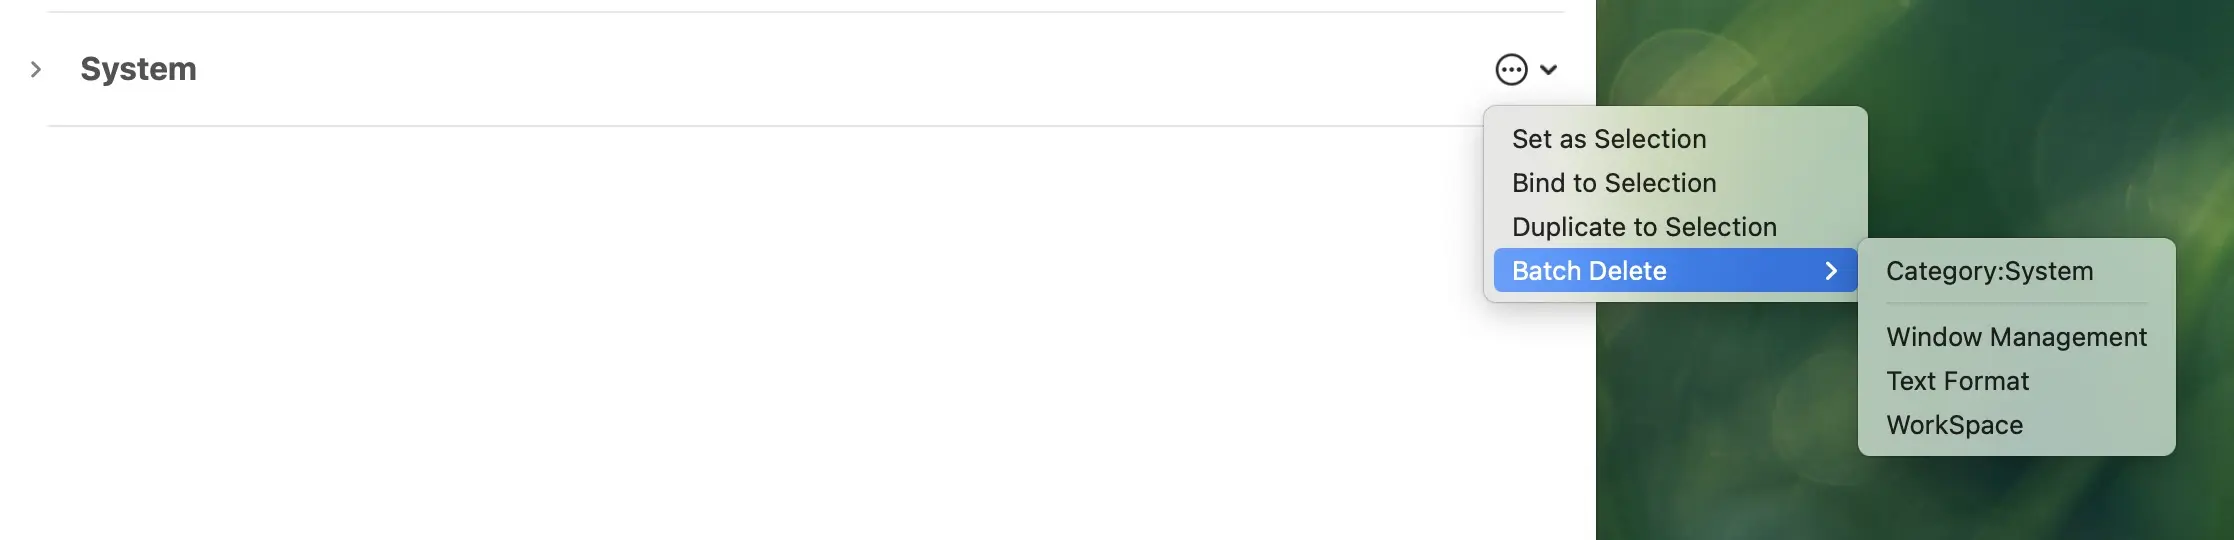
Batch Delete
Click Category Menu -> Batch Delete, options will pop up
- Category: Batch delete all entries under the currently selected APP
- Tag: Batch delete all entries under the selected subcategory
Display Mode
Show All (Default)
The shortcut manager lists all shortcuts by default, including activated/set Rebind shortcuts
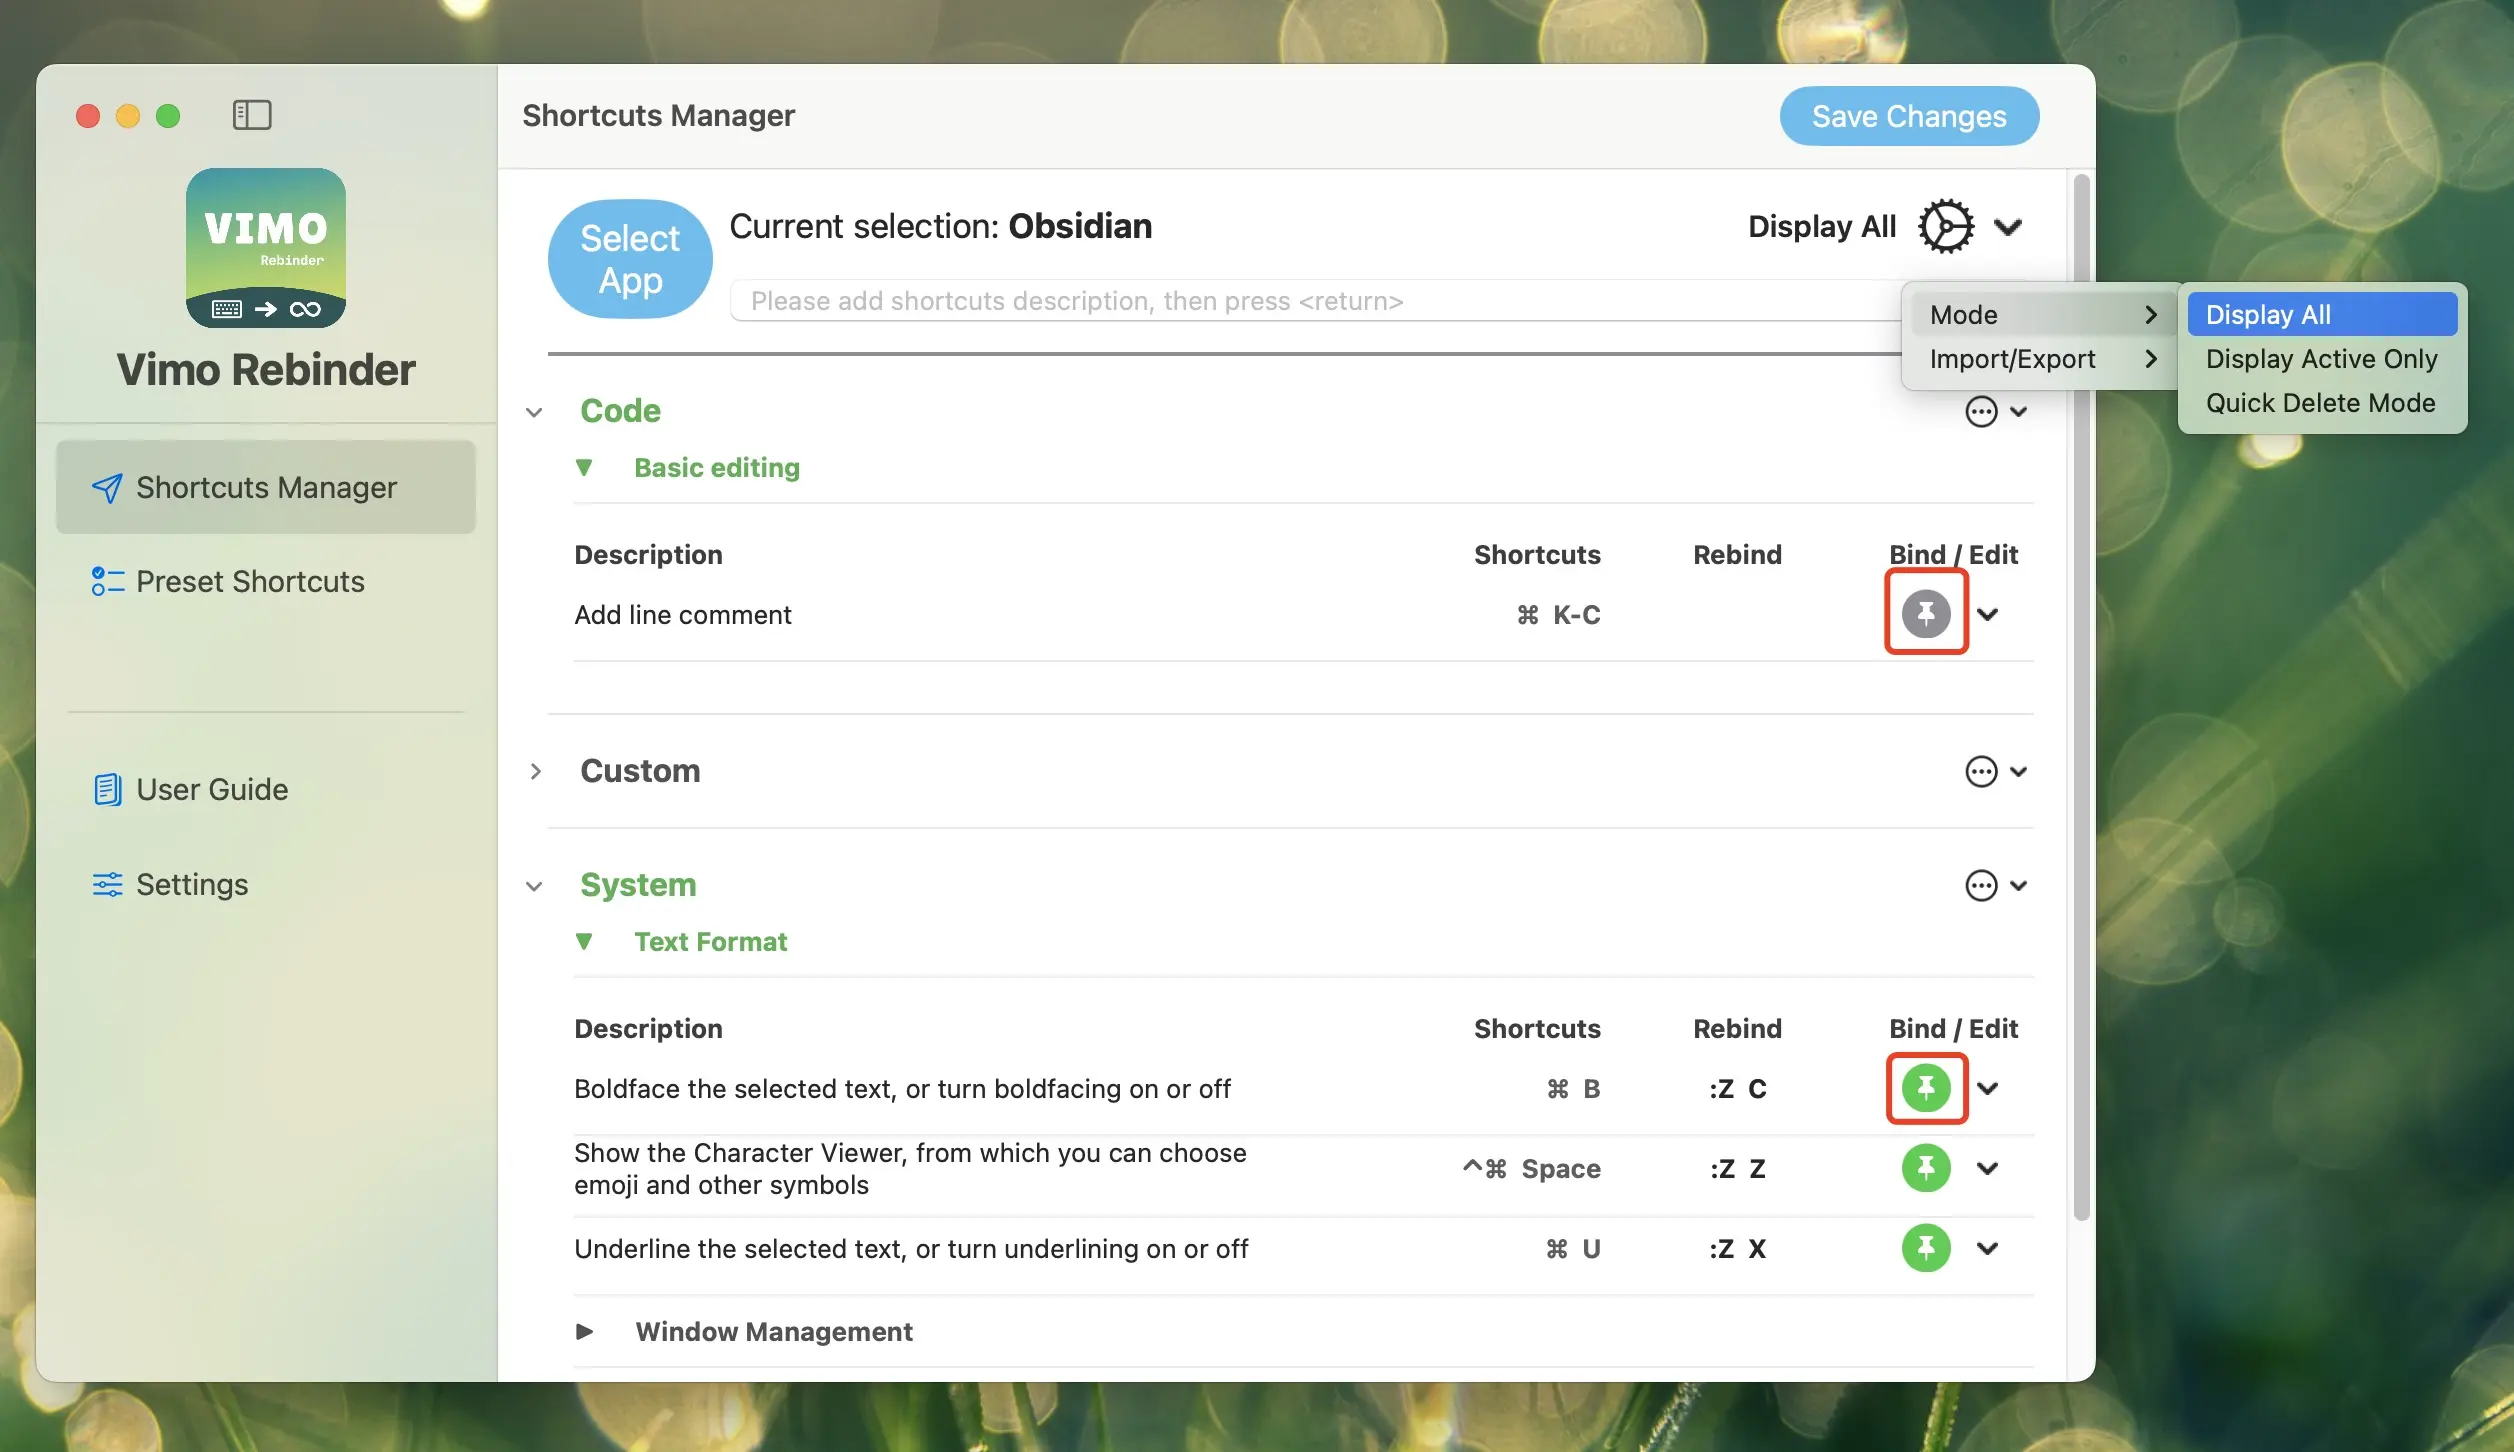
Show Only Activated
Only display activated/set Rebind shortcuts
Quick Delete
After entering quick delete mode, all modification/menu options after the entries will change to "Quick Delete Button". Clicking it will directly delete the corresponding entry.
Import and Export
Template Field Introduction
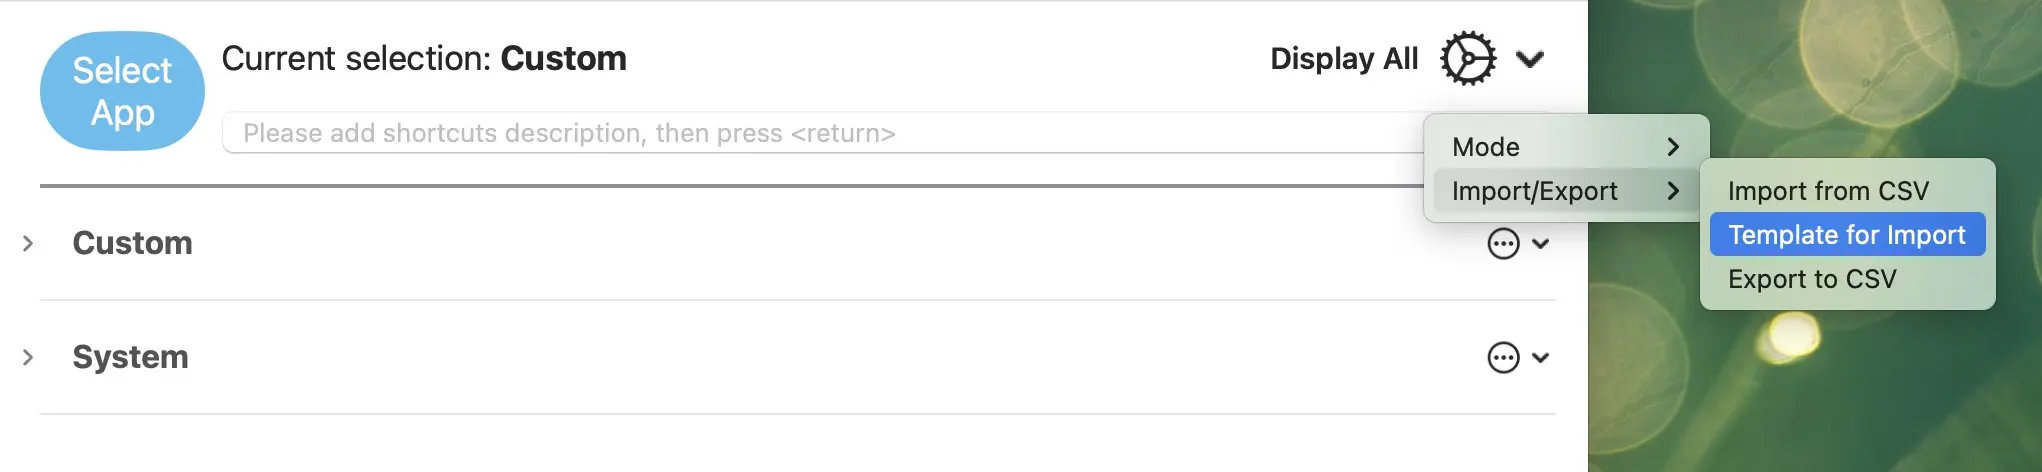
Click "Template for Import" to generate a template for import on your computer
- Category_ID: The Bundle ID, which can be viewed in the App selector:
- Category: APP display name
- Shortcuts: The App's original shortcuts
- Rebind: Rebind shortcuts, format is (modifier key:character key), e.g., (ctrl:a+s | alt+ctrl:c+d)
- Description: Shortcut description
- Tag_id: Shortcut subcategory

Export
Click to enter the export interface

Import
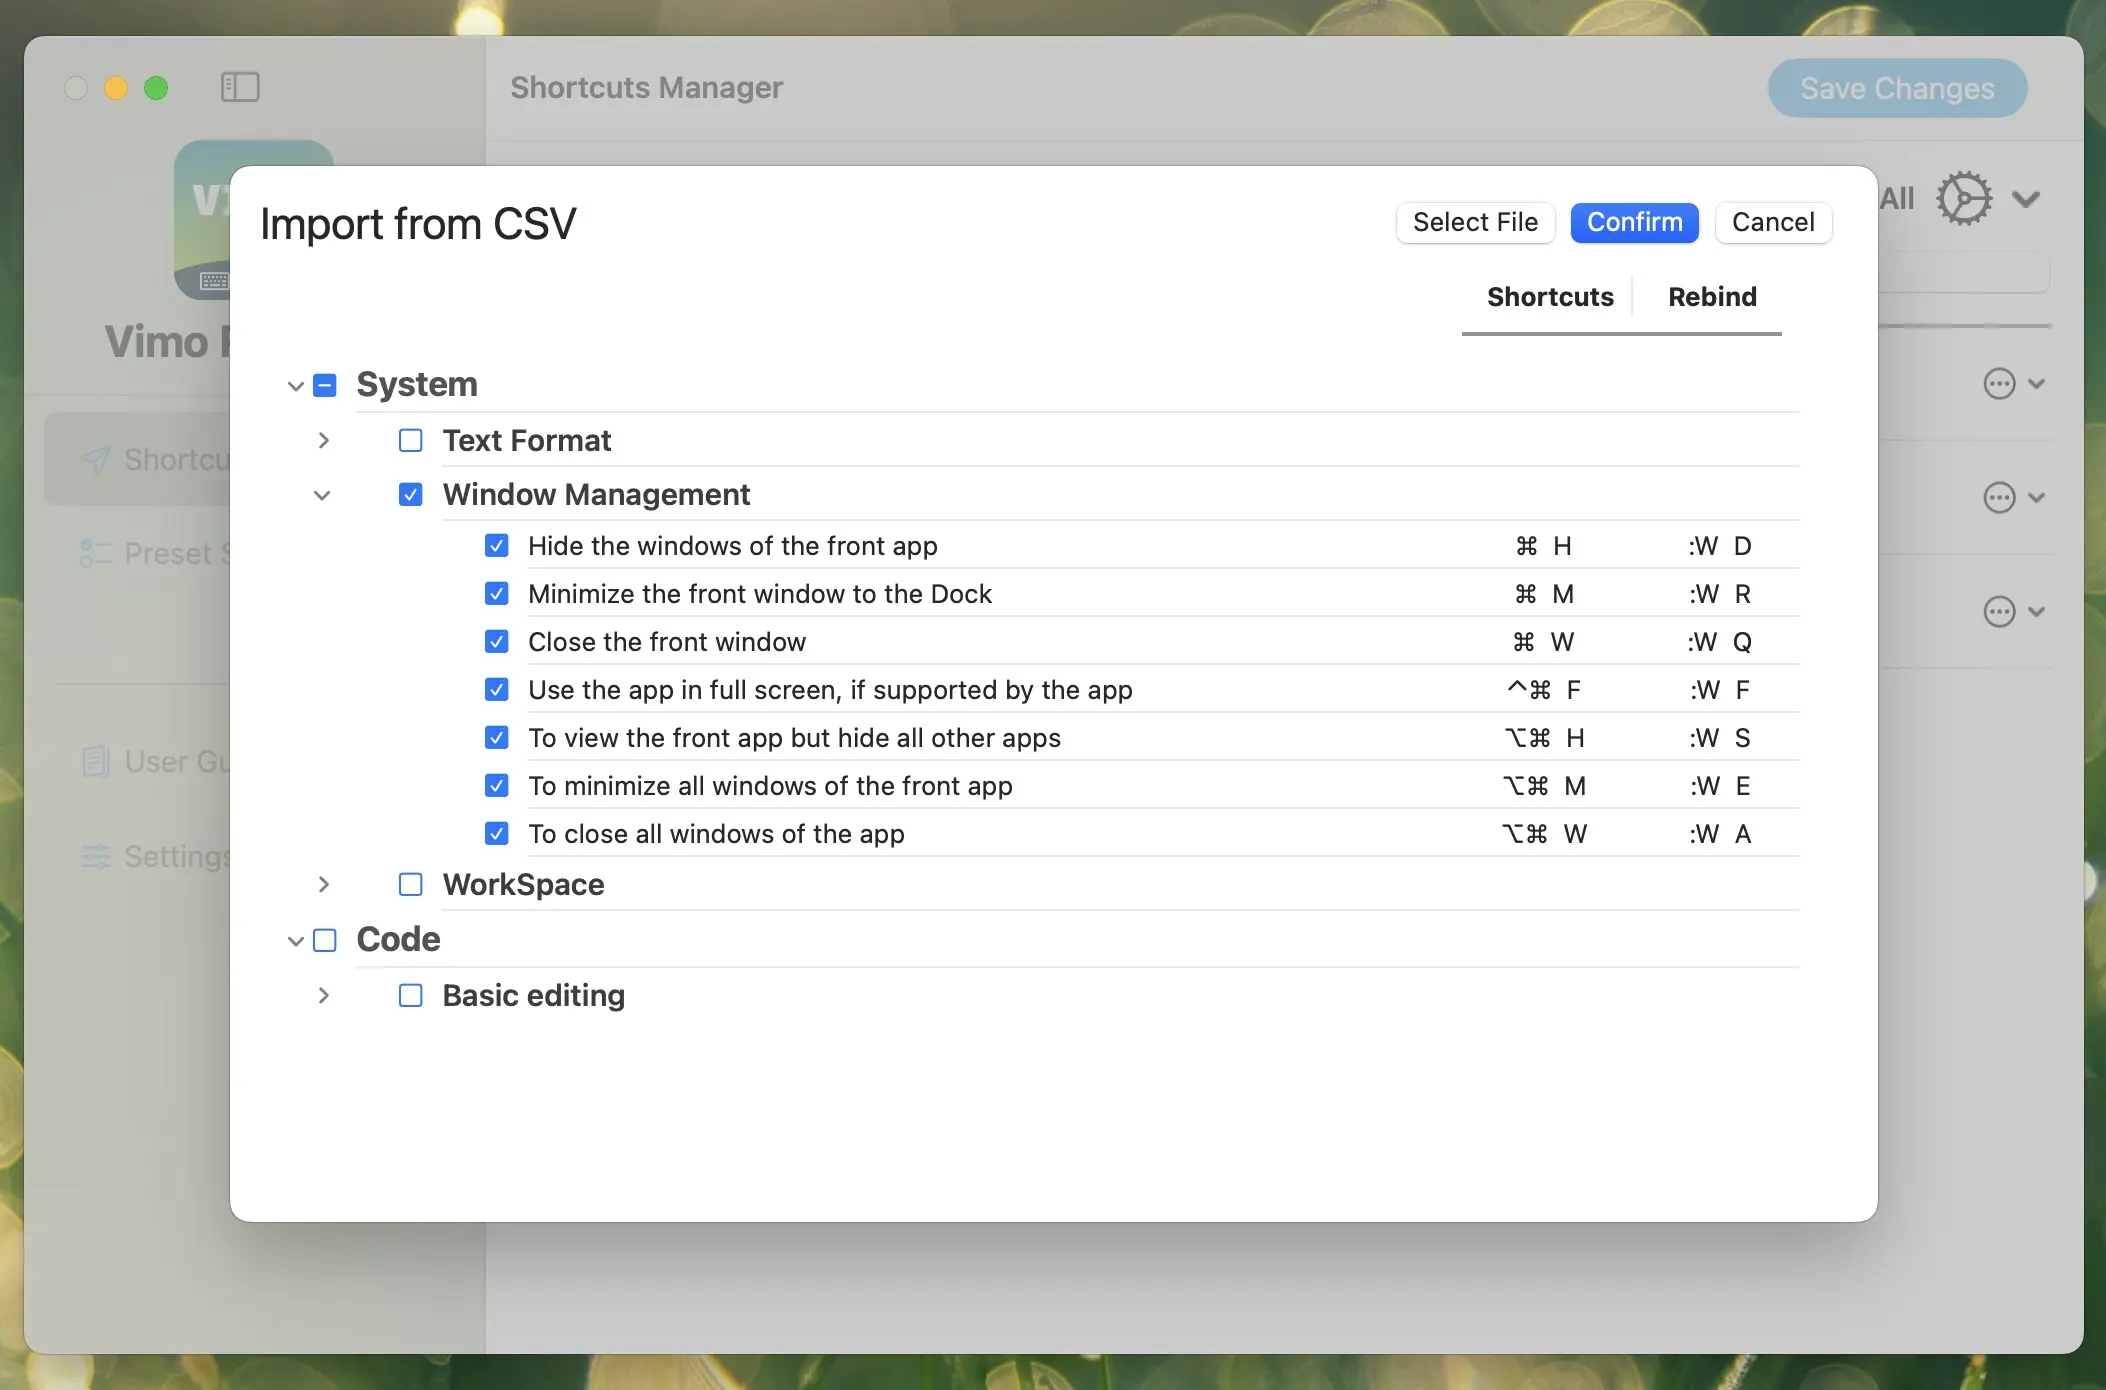
- Click to enter the import interface
- Load the file to be imported
- Make selections as needed
- Click import to complete. Note that if there are already identical entries, that entry will not be imported.


